Arthas 源码阅读
结构
1 | ├── agent [ClassLoader/代理启动] |
Attach 背景知识
参考:
使用 Bootstrap java -jar arthas-boot.jar <pid> 逻辑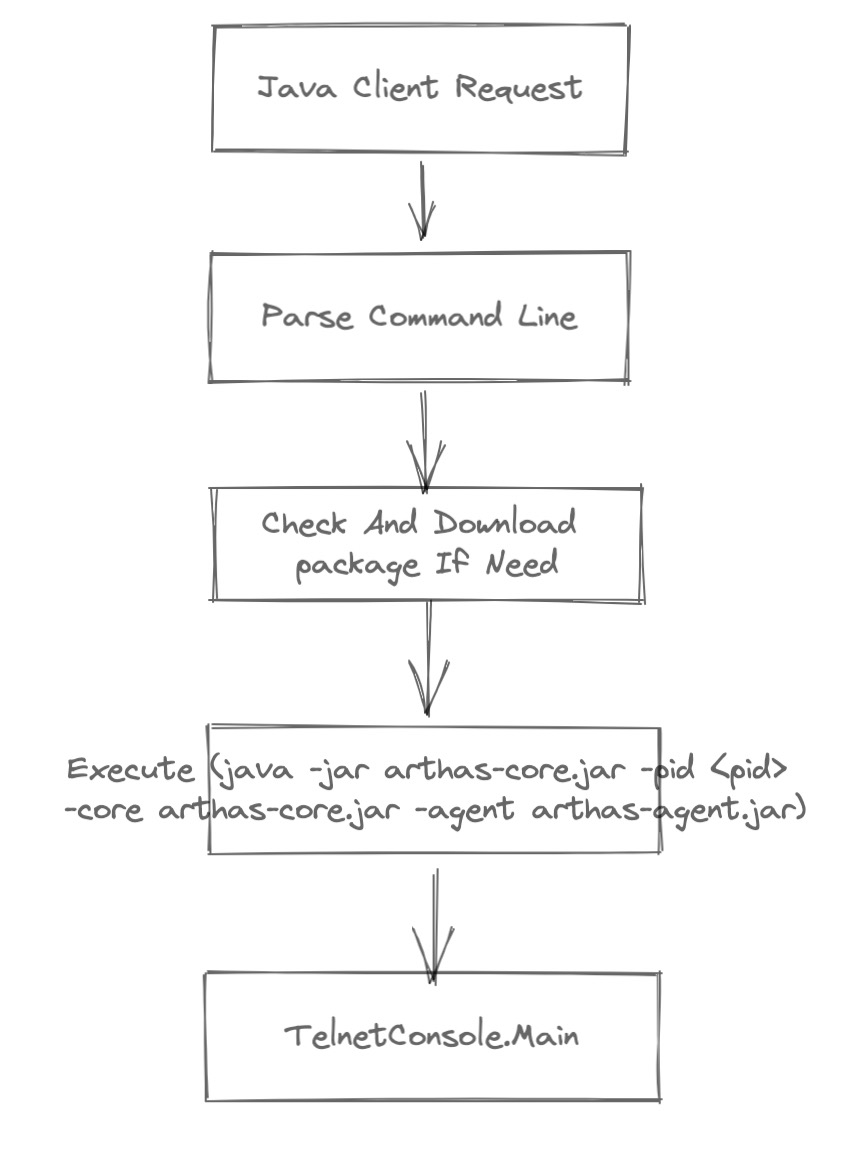
可以看到主要逻辑在 java -jar arthas-core.jar 中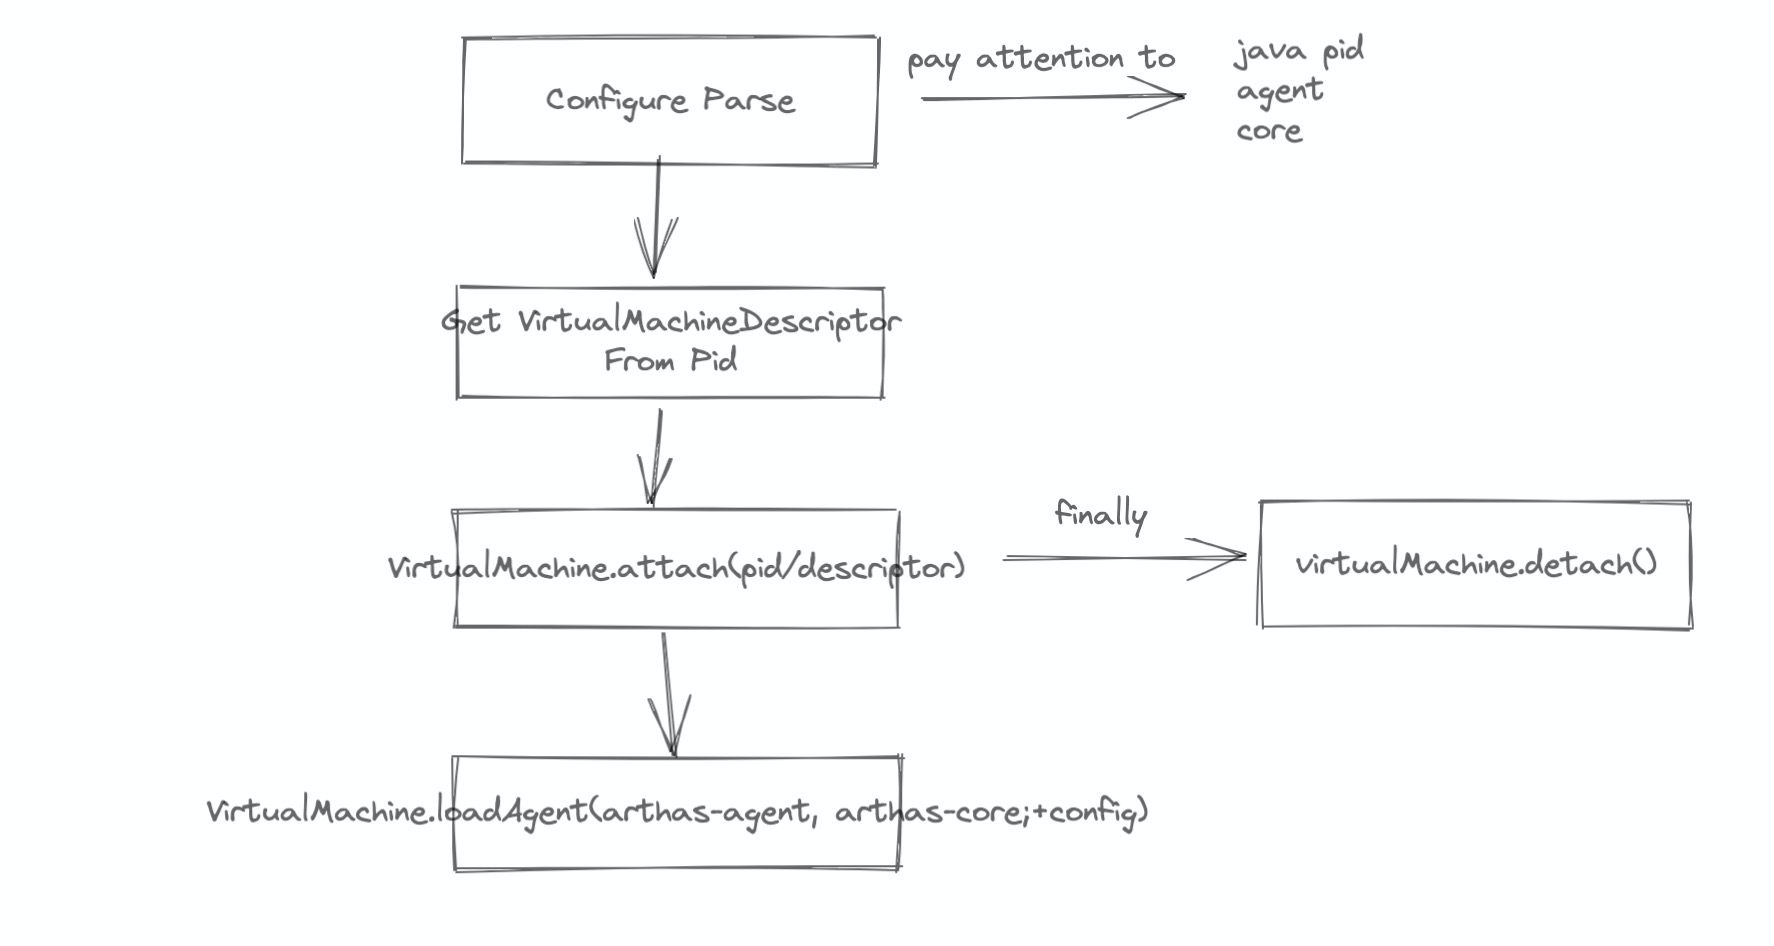
现在主要逻辑转向了 arthas-agent 了,下面是它的 main 流程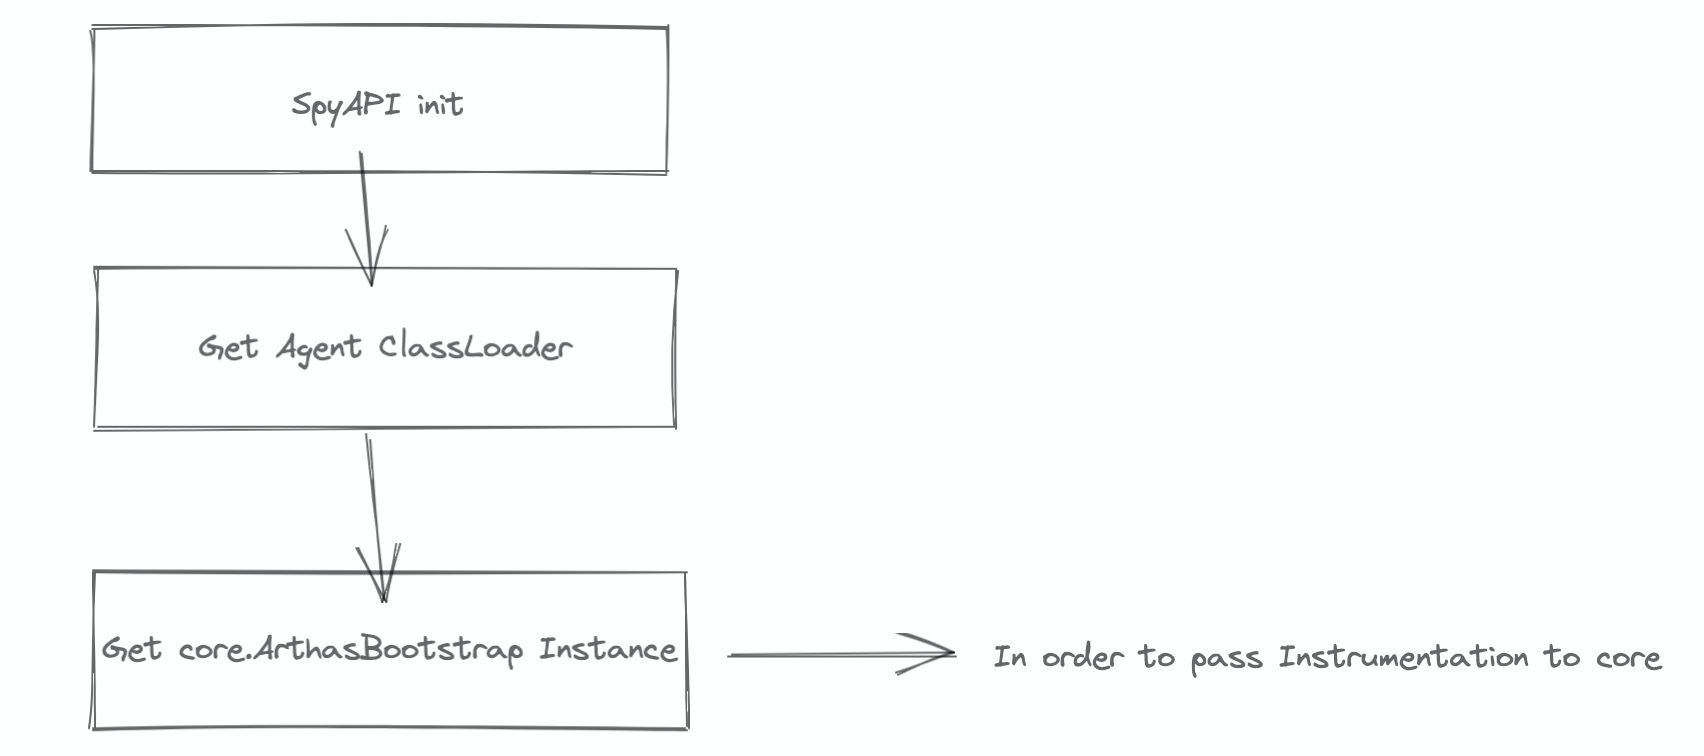
现在逻辑就转到了 ArthasBootstrap 获取到 Instrumentation 之后的初始化构建逻辑中了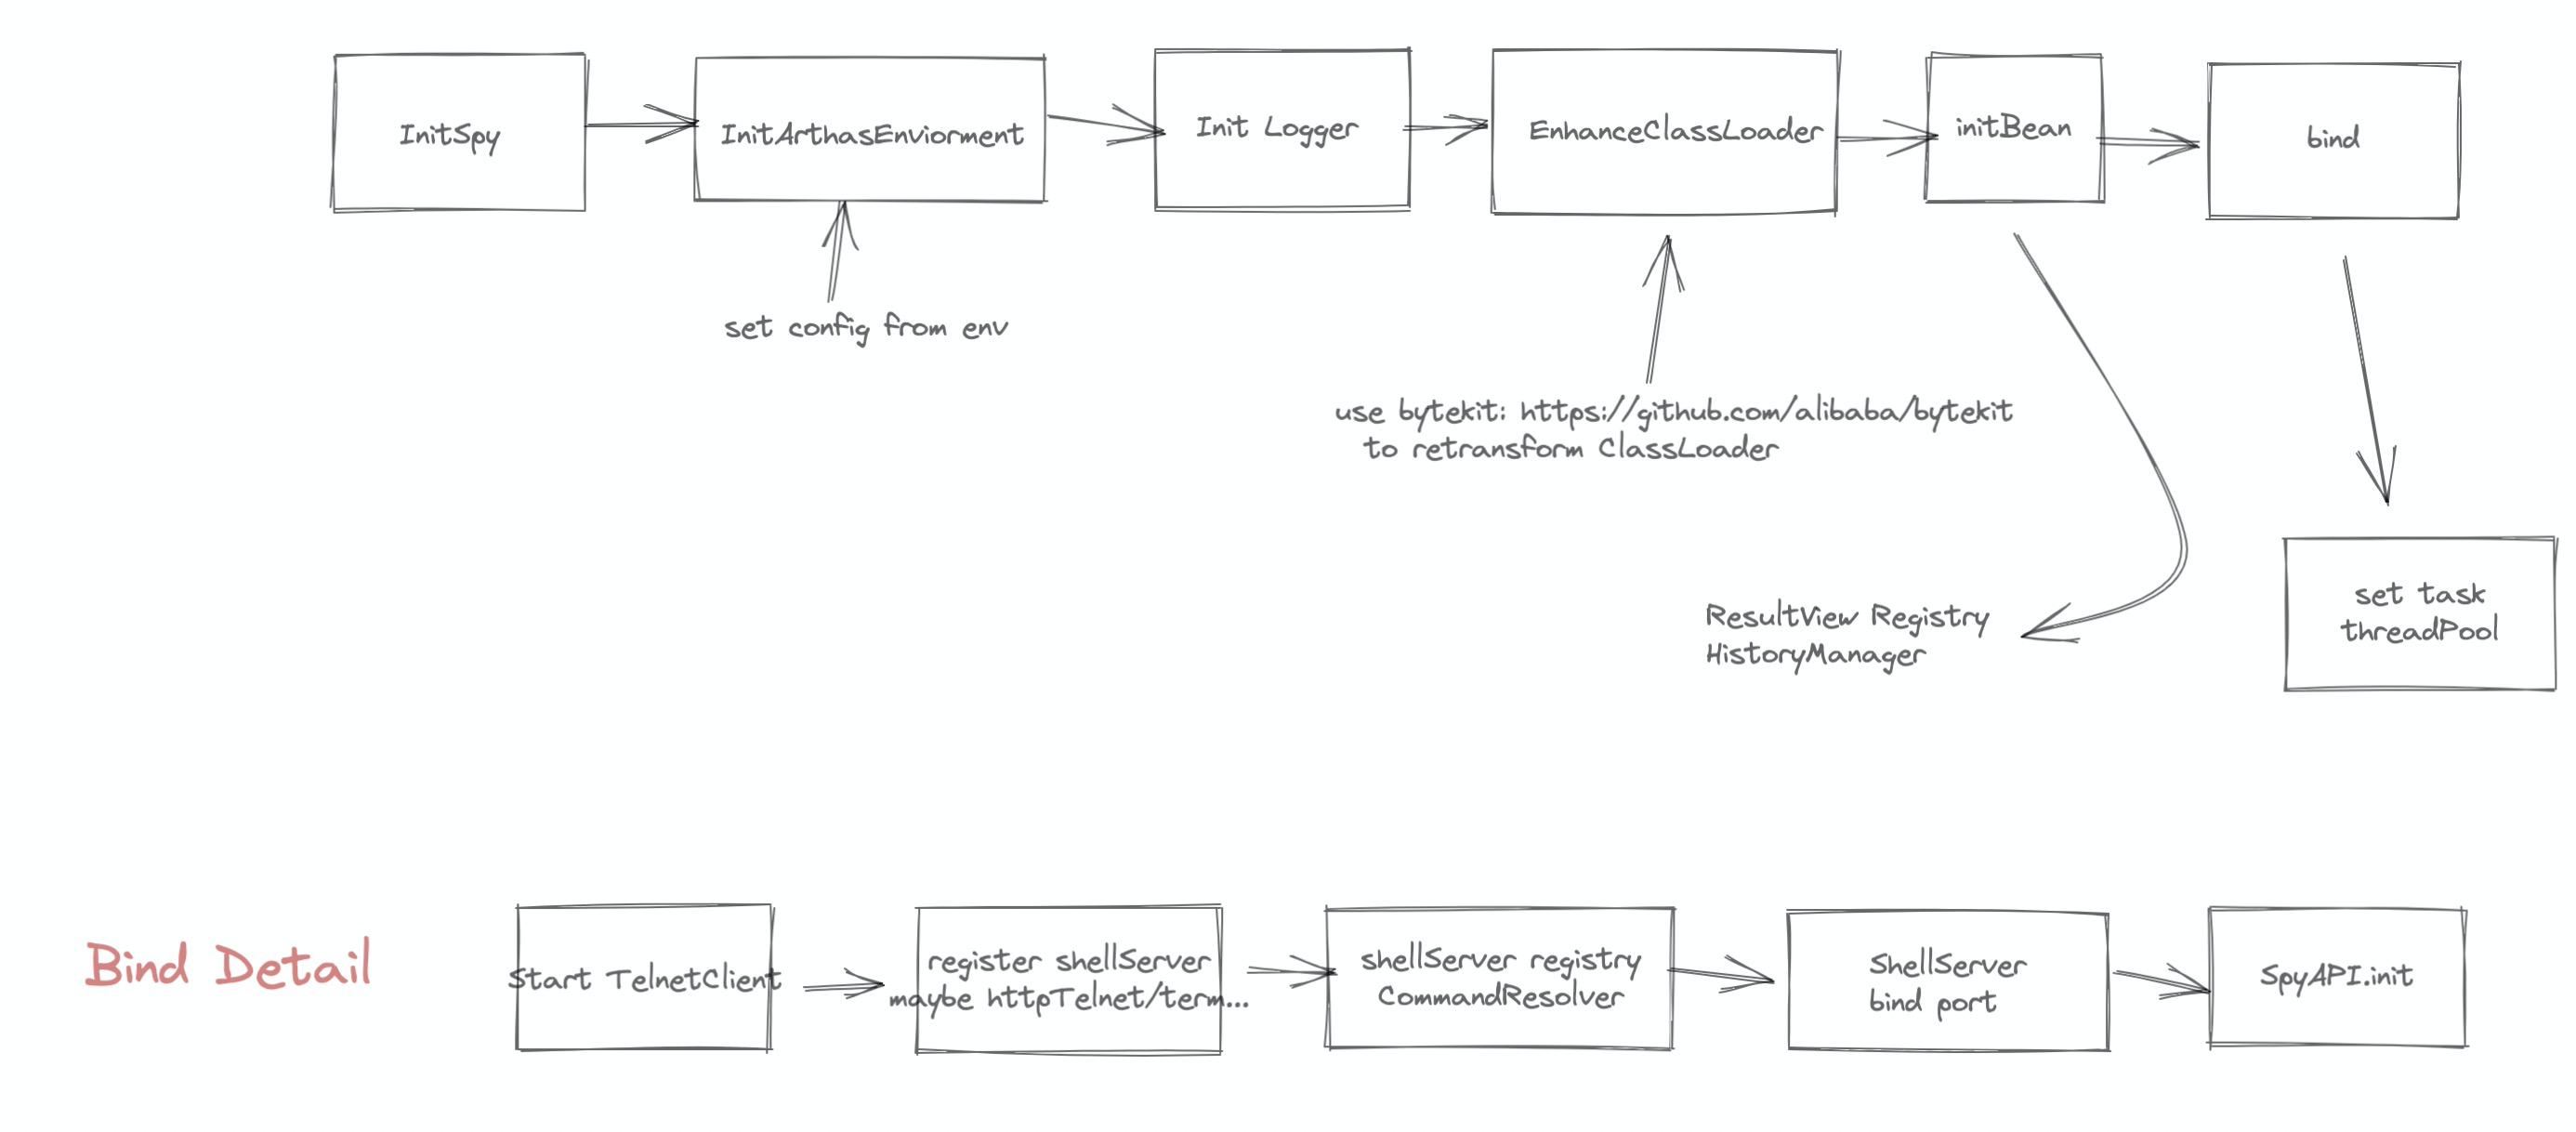
自此,在启动了 Server 并准备完成 ThreadPool 之后就算启动成功了。
从 Server 中我们可以简单猜一下,命令是通过 TelnetClient 发送到指定 Server 执行并通过注册的 CommandResolver 来进行解析执行。
怎么执行 Shell 指令的
以 thread 命令来举例:https://arthas.aliyun.com/doc/thread.htmlBootstrap 在最后启动了 TelnetConsole 的 main 方法,此时 TelnetConsole 就会在中断阻塞等待用户输入命令。(参考 TelnetConsole.process)
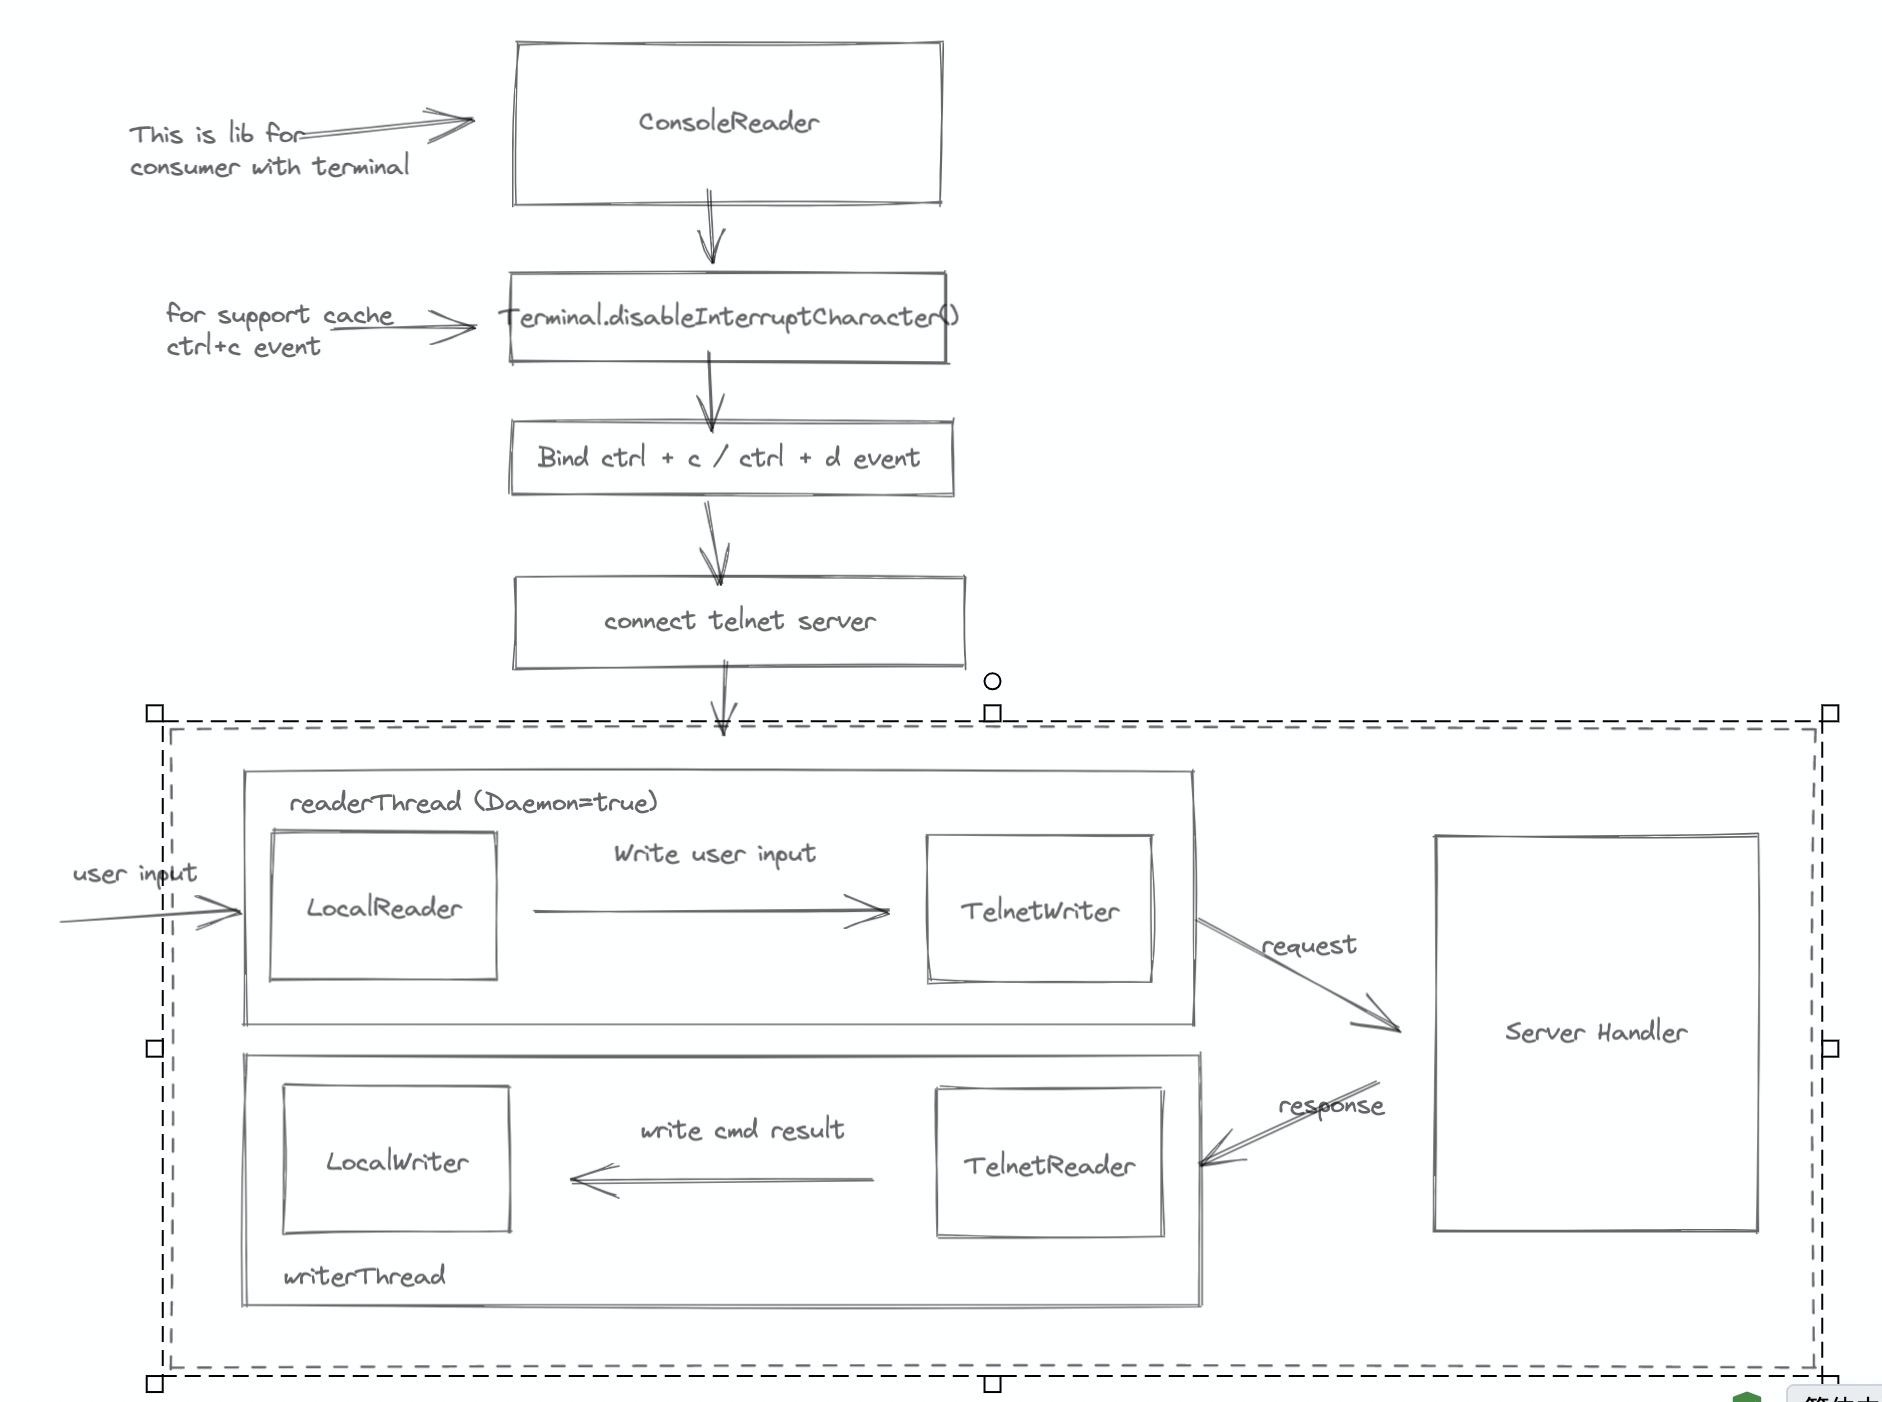
这样我们所有的输入最终都会被 ShellServer 接收并解析。理论会存在三类 TermServer 来接收用户下达的指令。
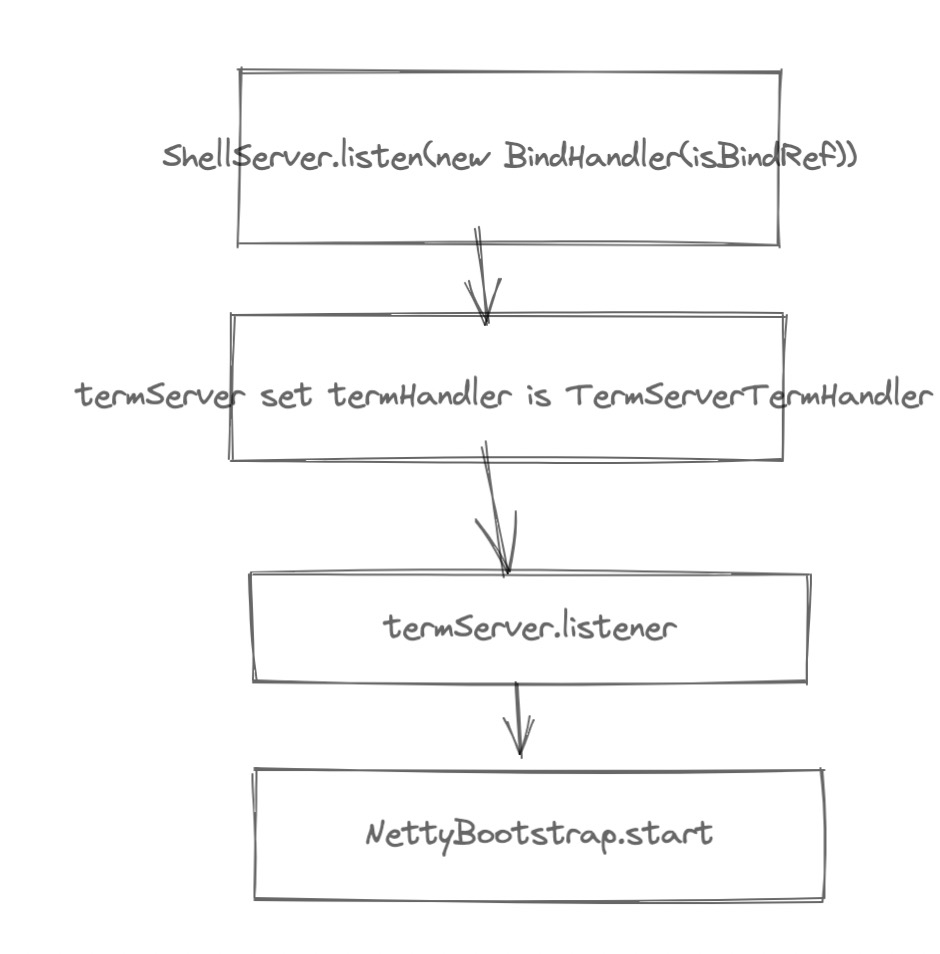
分别是常用的 HttpTelnetTermServer / HTTP 接口 HttpTermServer 和 TunnelServer 的 HttpTermServer,其内部都是使用 Netty 实现的,而处理的 Handler 则是 TermServerTermHandler
当请求到来时候
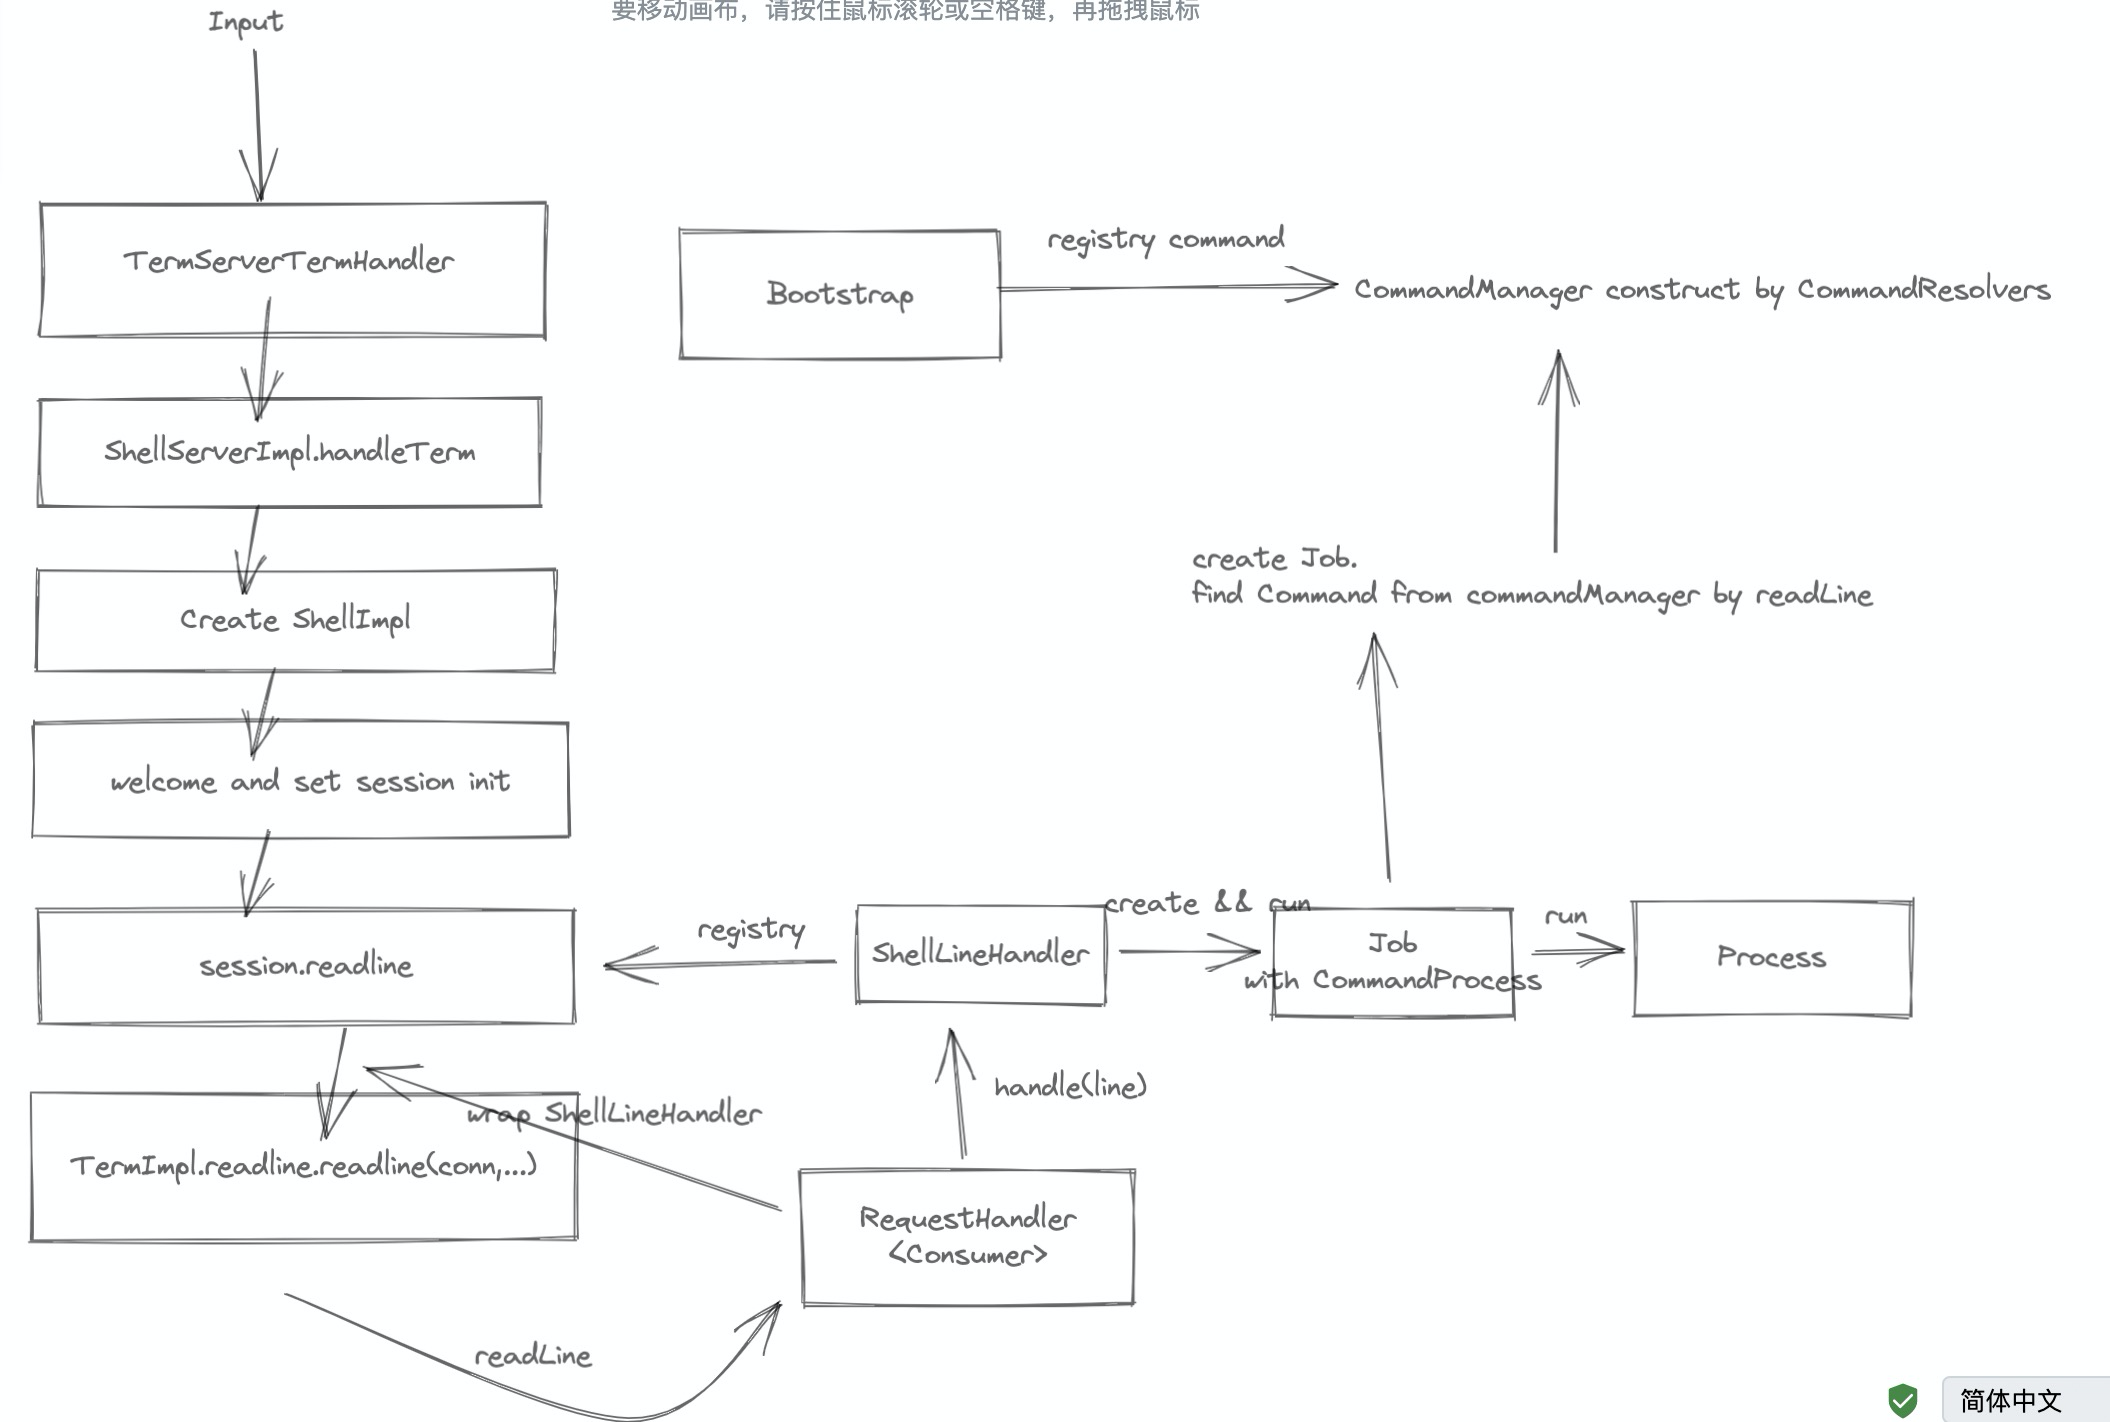
另外 ShellImpl.readline 中的 CommandManagerCompletionHandler 是用于捕获 Ctrl-I keyEvent 来做命令补全的,这里的补全实际就是 Command 接口的 complete 接口。
这里从 Job - Process - Command 也值得说道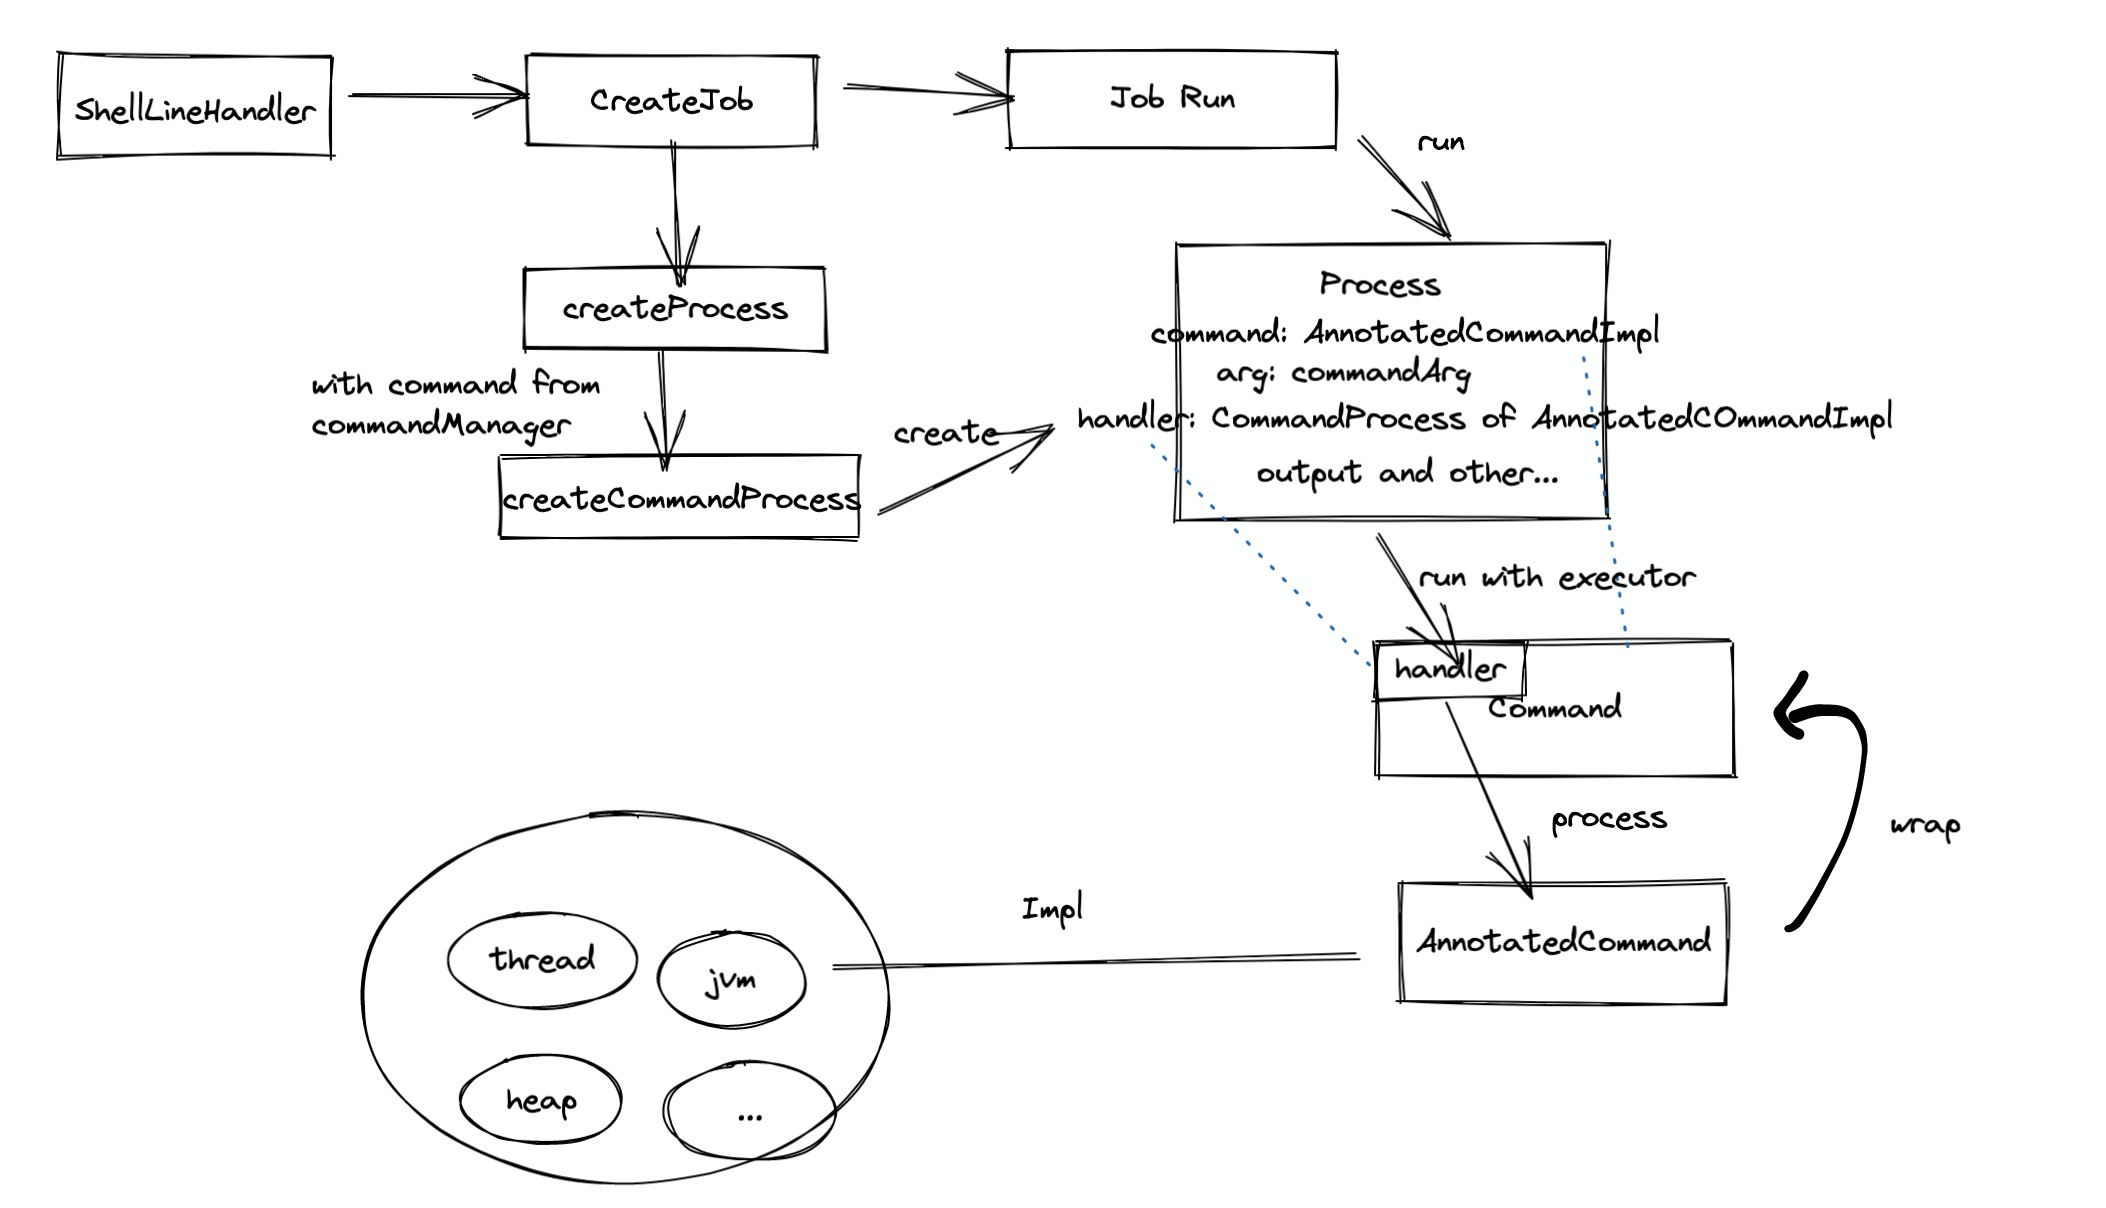
这样我们大体知道,Arthas 在启动的时候
- 将所有 Command 注册到 Server 中
- 启动 Client 发送请求到 Server 中,Server 解析,并通过
ProcessImpl来执行对应的Command - Command 想代理的实际 AnnotatedCommand 中执行命令
当然 Process 的执行过程远没有这么简单,中间涉及到命令的状态维护,会话维护等信息,这里就不展开讨论了。
这样我们看 thread 的命令实现实际就局限到 ThreadCommand 中的 process 方法了,能明显看到处理逻辑实际是
- 获取所有 thread 详情
- 获取 pid 的 thread 详情
- 获取 topNBusy 详情
- 获取 blockingThread 详情
获取的技术分别是
- 通过
CurrentThreadGroup的getParten逐步往下获取所有线程,直接使用Thread的信息 - 通过
ThreadMXBean获取 Thread 的 CPU 详情、锁信息等
怎么获取 JVM 信息的
从 JvmCommand 中可以看到
- Jvm 基础信息通过
RuntimeMXBean获取 - 类加载信息通过
ClassLoadingMXBean获取 - 编译信息(编译次数)通过
CompilationMXBean获取 - GC 信息通过
GarbageCollectorMXBean获取 - 内存信息通过
MemoryMXBean获取 - 操作系统信息通过
OperatingSystemMXBean获取 - 线程信息通过
ThreadMXBean获取
Watch 接口如何实现的
WatchCommand extends EnhancerCommand 其中的所有方法都会走一遍 EnhancerCommand.process 方法,其内部逻辑
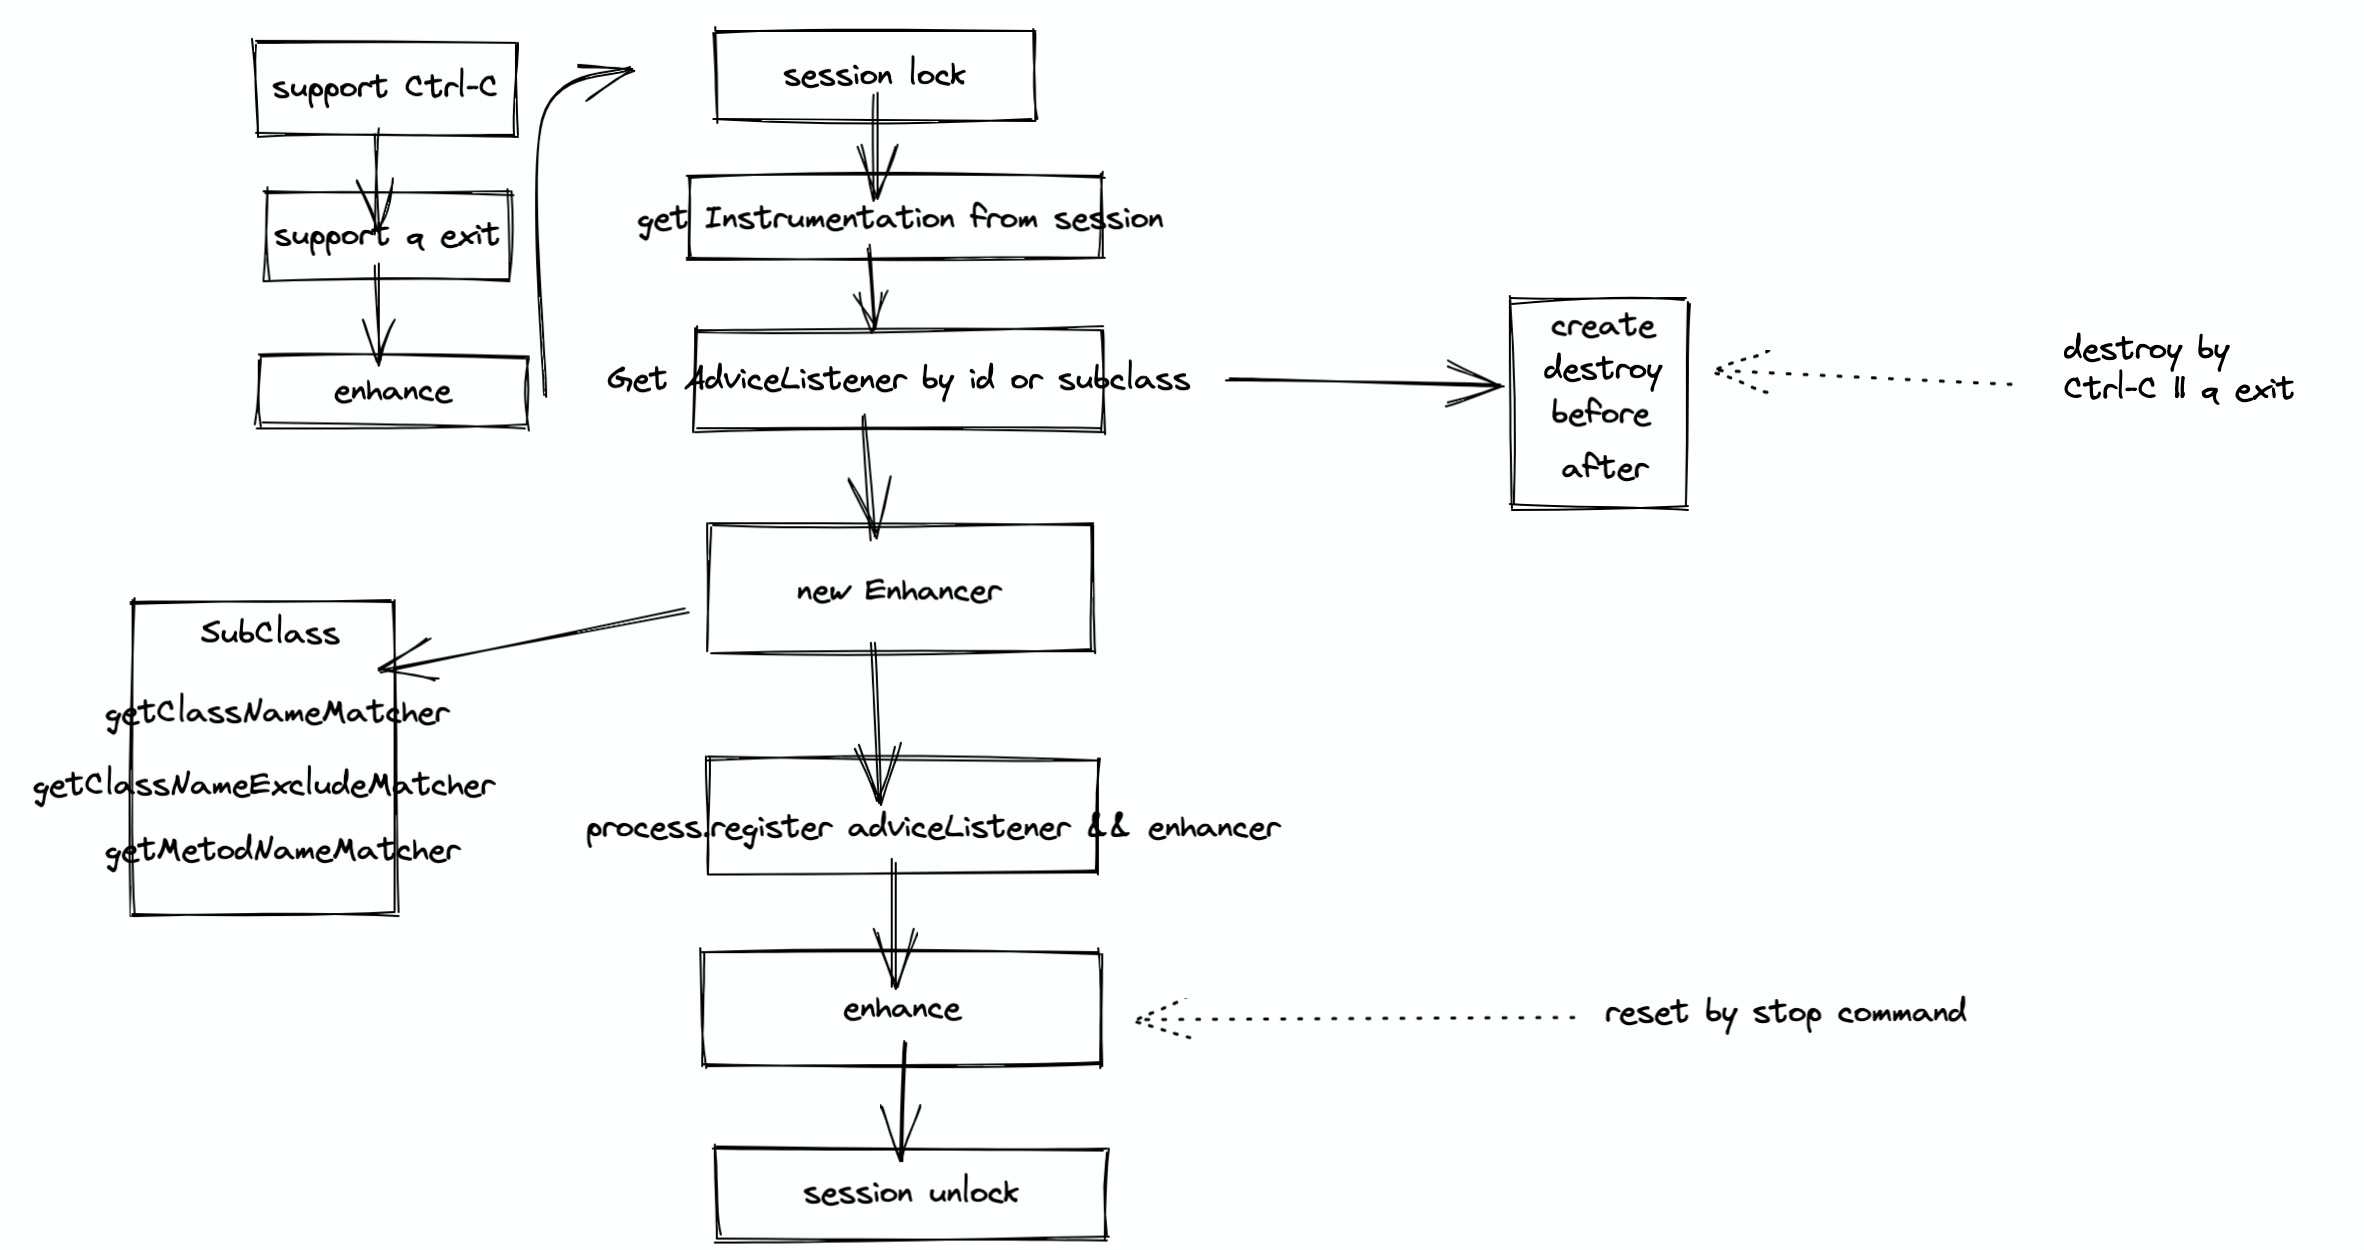
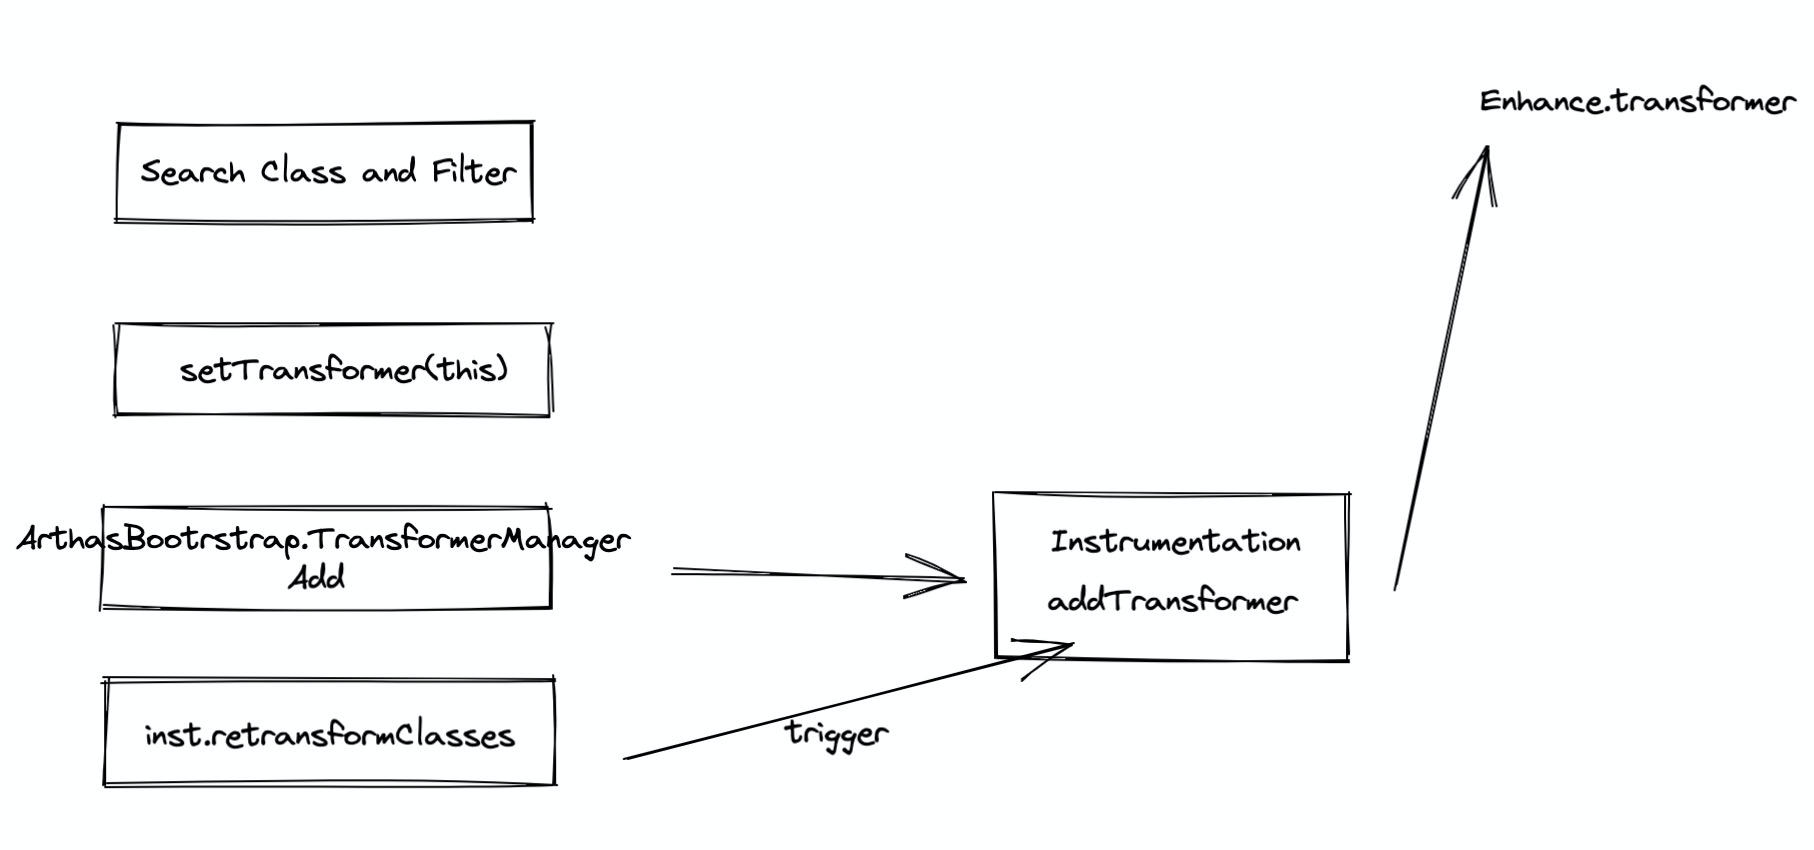
Enhancer 的逻辑实际就是通过字节码增强类,将 AdviceListener 的逻辑套用到被 Enhancer 的类中
Enhance
WatchAdviceListener
实际就是获取到了一个 Advice 对象可能获取到方法运行时刻的信息,该信息是由 AdviceListener 得到的信息拼装得到的
Profiler 逻辑
ProfilerCommand 这个本身是使用了一个二进制工具来做的 profiler,这个没啥好说的,具体详见 https://github.com/jvm-profiling-tools/async-profiler/tree/v1.8.1
使用:能否通过指令操作动态控制指定进程
方法一:指定命令
从代码可知(我在文档中确实没看到),我们可以指定 --command 来指定多条命令以达到效果,比如这样就自动退出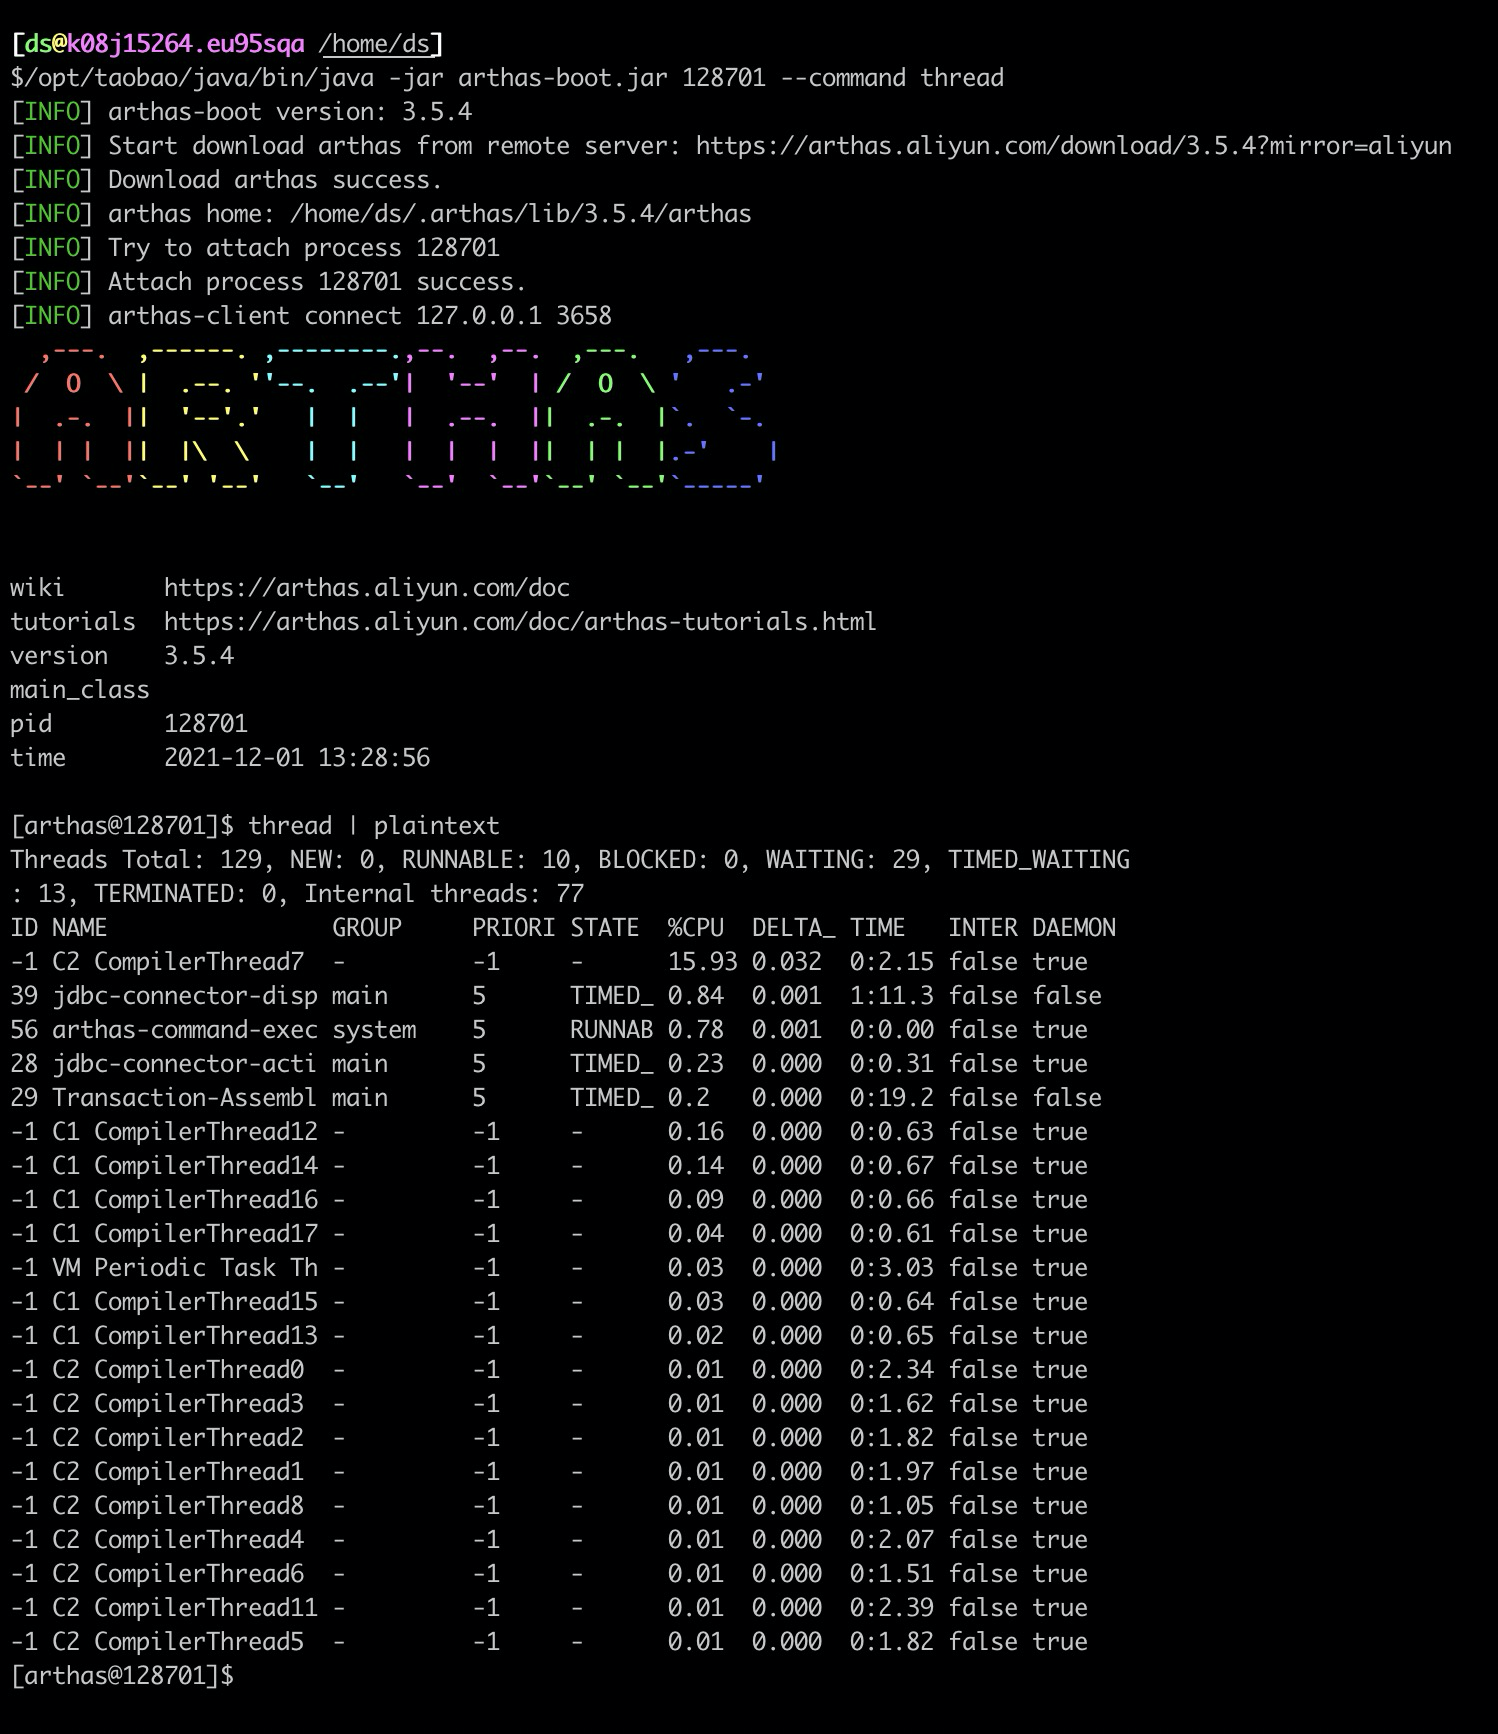
但是这类方法可能不适用(直接)于 profiler (或者类似需要在控制台等待(保持 attach)一定周期的命令)这个时候可能下面方法 2 更为合适
方法二:通过 HTTP API
当然其他的 API(Arthas 同时还提供 Arthas Tunnel 来管理多个 Agent 能力) 也可以。
参考:https://arthas.aliyun.com/doc/http-api.html
- 可以考虑在一个 agent 请求内启动一个独有的 http port 然后 agent 一个 程序
- 使用 HTTP API 来进行会话交互(单次命令也可以) 并将结果返回
- 销毁 agent (因为 attach 的时候会对字节码进行增强,只有 exit 的时候会 reset 字节码增强的逻辑)
相关组件学习
Termd Demo 学习
https://github.com/termd/termd
ReadLine
1 | public class ReadLineExample { |
对于 Consumer<Completion> completionHandler 的理解
- 首先
Completion是一个 KeyEvent 通过 SPI 注册到 Readline(Function.loadDefaults->addFunction) 中 - KeyEvent 的定义在
io.termd.core.readline.Keys中定义了name与sequence及字节码的映射关系 - 具体映射事件详见:https://github.com/termd/termd/blob/58dc750ce989bf5297323f5e021383552f3fab51/src/main/resources/io/termd/core/readline/inputrc
- 可以知道 Complete 事件是
\C-i,由Keys得知是CTRL_I事件,用途是用来补全文本的